Showing posts with label bedrooms. Show all posts

Saturday, March 3, 2012

Grosgrain Ribbon "Matting"

Hello all! I'm so excited to show you my favorite element (so far) of the nursery. I showed you back here the prints I bought from etsy. I'm super happy with them but I bought them in 11x14 and my cheapo frames from IKEA were just slightly bigger than that. I had to come up with a solution to hide that fact.


Here you can see at the bottom of the frame where I had a little space. It was like this at the top as well. I also didn't like that you could see the outline around the edge of print.


Close up :-)


I used an orange grosgrain ribbon to conceal the problem areas and to add a little punch of color.


I cut four strips of ribbon so it would be just slightly longer and poke out the back. I laid it right up against the glass of the frame and put the print over (or I guess, technically, "behind") it. I put the backing on the frame just like I normally would and used the little tabs of ribbon to adjust the placement so it was just right. I trimmed the excess and voila:


I'm loving the extra bit of color this adds and they're going to look fantastic against the gorgeous blue wall.


We've got the blue wall painted and the crib is up. I've been posting some progress pics on my Facebook. I'm going to order the fabric for the curtains this weekend but want to find a fantastic coordinating fabric to use as an accent so I can order them all at the same time.

So, does anyone have any ideas for a great fabric to coordinate with green and white zig zag?

Sunday, February 26, 2012

Design Plan - Laura's Renewed "Big Girl" Room

I've been wanting to re-do my daughter's bedroom for a while. When we moved in to this house I just kind of threw together something that sort of "worked" but I didn't put too much thought into it. I used leftover bright pink paint from our last house and put some pretty decals up on the wall.

Well, I've been asking her for a while now if I could change her bedroom and she's refused so far. That is, until she saw this wallpaper from Anthropologie.


I fell in love with it instantly and she literally looked at it and said "I want that"! (Gotta love three year olds!) Anyway, I'm now saving up for one roll. I normally couldn't bring myself to spend $150 on one item for a room but there is just something about this I can't get off my mind. AND it set off a whole design idea for her room.

We've decided to put the wallpaper on one wall. It's a super busy pattern and I don't want to overkill. On that same wall, we're going to do a setup like this.


I've been wanting to do a DIY padded headboard for her for a while and thought a built-in around it would be fantastic. Here is my (somewhat decent) "blueprint".


That big rectangle on the right side is a mirror. Her closet is on the wall perpendicular to that and there's only about seven inches clearance for her bi-fold closet doors so I can't extend the shelf the whole way. I still wanted it to have a symmetrical look so I'm going to use mirror tiles and molding to create a full length mirror.

I'd like to have enclosed cabinets that are a bit deeper than the shelves above to use as night stands and plan to use sconces above the headboard or on the sides and then some recessed lighting in the shelf above the bed (bridging the shelves on the sides).

I found the picture below and loved the paint and molding on the bi-fold closet doors and think this might be worth a shot.


Of course, I need to figure out what to use to replace her builder grade boob ceiling fixture. I'd love a brightly colored fixture along the lines of these:


Finally, I found this picture on Pinterest and loved it! It would be fantastic somewhere in that room and would be an awesome compliment to the wallpaper.


I'm also thinking of yellow chevron curtains and a navy ikat on her reading bench as well as a DIY knockoff of an Anthropologie duvet. I don't expect this room to be done soon but my husband is itching to get that built-in done so you never know. In the mean time, check out my pin board on Pinterest for this room and get a look inside my head.

I'm really trying to be a better blogger and keep the time between my posts at a minimum. I've got a ton started and just need to get my stuff together to show you!

Have a great Sunday and I hope to be back this week with some updates on the nursery :)


Wednesday, December 28, 2011

2011 Wrap Up

Hello friends! 2011 has been a big year and I can't wait to share with you some of my favorite posts and happenings.

My five most popular posts this year have been:

#5


I love these in my bedroom. The cream color adds some much needed light to the space!

#4


I paid $14 for 2.75 yards of this gorgeous Sun N Shade fabric and am planning on finishing up my deck project this summer. Here are the fabrics I'll be using.


#3


This summer I did a mini re-do of my downstairs bathroom. It was just the freshening up I needed...and SO simple! I've since added a DIY Sunburst Mirror to the spot next to the mirror. It's the perfect finishing touch!


#2


This was another one of those never ending projects. I had so many problems with the paint bubbling up and I spent so much time sanding and re-sanding. In the end, it was worth it! This is the perfect storage solution for DVDs, diapers and wipes, toys...I love it! I do still need to buy the hardware I've got picked out but I'm having a difficult time getting myself to spend the money. The knobs and pulls are $5 each and I know that doesn't sound like much but that's $60 total and I just don't want to take it out of my budget. I am planning on a re-do of this whole space sometime this year so when I begin that, I'll buy my knobs :)

#1


This was by far my most popular post this year and one of my favorite projects. This goes to show you what a little bit of elbow grease can do. I bought the bench for $20 on Craigslist, pulled off some nasty upholstry and padding, repainted and reupholstered it. For a $30 total investment, I have a fun new piece of furniture and a great addition to my little girl's room.

So, those were my most popular posts of 2011. I want to share a few of my personal favorites.

#3

I loved the Valentine's Day crafts I did this year and I smiled every time I looked at them. I can't wait to get them back up and to do even more this year :)


#2


I love this little guy. He just makes me happy :)

#1


These are my absolute favorite project from this past year. I fell in love with the fabric and got an awesome deal when I found it in the clearance bin at Joann. Unfortunately, I only had enough for one window. I hunted and hunted for this online but this color isn't made anymore. (It's Waverly Lovely Lattice in mocha. They do make this in the Sun N Shade fabric but I had the 100% cotton and needed the same to match up to what I already had.) Finally, I tripped over a store that had this online.

I love everything about this fabric. The weight, color and pattern are perfect and the curtains are perfect for my living/dining area. Almost every time I look at them, I can't believe how lucky I was to find that second five yards :)

2012 is going to be a busy year for me too. I've got a monster list of projects and to-dos that I'm planning on posting soon. Included in that list will be converting my guest room/office into a nursery for a baby boy coming in April. That's my biggest DIY project planned for 2012. (The baby, not the room!)

I've had so much fun looking back on 2011 and it's inspired me to forge ahead in the coming year. I've loved all the friendships that have developed through this blog and all the support I've received. Thank you ALL for making it wonderful :)

Linking up to:

Thursday, April 14, 2011

Office Re-do...In Process

So I've been putting off posting on this because I really wanted to wait until it was all done to show you the transformation but I'm realizing that things are moving more slowly than I had hoped. The office/guest room re-do is moving along, just at a turtle's pace.

I don't know why I didn't take a before pic. This room has been in bad shape since we moved in a little over a year ago. We put a coat of paint on the walls without really thinking about it, basically just to have something other than primer on the walls. I've never really been happy with the color we chose, it was leftover from the basement family room in our old house and although it looked really great in that room, it was just a little too dreary for this room. Also, this room kind of became a catch-all for stuff. We moved from a larger house into this smaller one and we are still working on getting rid of the junk.


We decided to go with Behr's Creamy White. I love this color and have used it in other places. Normally I would prefer to have some color on the walls but because these basement bedrooms don't get much light, I wanted to get my color from fabrics and accessories instead of the walls.


Here is my husband wading through all the junk to paint. Bless his heart :)


Here is a better pic to see the contrast of the two colors.


Here is the workspace he built for me. I wanted it to fit like a built in and be the whole length (10 feet) of that niche in the wall. I'm planning on skirting the desk and will paint and refinish that chair. I'm also going to fill the wall above it with shelves and a cork board. I was inspired by Britt at Gus + Lula and her long desk. If you haven't seen her blog, you MUST check her out. She's got so many great projects and such a great eye. When I first found her blog I spent hours going back through all her old posts...love her!


I was saw this fabric used in the master bedroom of Rambling Renovators and fell in love! I bought it and will be using it for the curtains in here. I've mentioned before that I've really never been a fan of blue but I really think I'm changing my tune :)

Add a DIY headboard, some new bedding, a new drum shade for the ceiling fixture and some pretty turquoise accessories and I think the room will be looking pretty good! Here's hoping I can find some time to actually work on this to get it DONE!

What are you currently working on? Have you seen Brtt's blog? Go check it out and tell me what you think!

Wednesday, March 16, 2011

Easy DIY Art (Before & After)

I recently showed you these faux bamboo frames I picked up while thrifting. I paid $3 for each of them.  I loved them right away despite the dingy paint finish and gaudy geishas. I knew right away they were going in my master but I just wasn't sure what I wanted to put in them. Well, this weekend I had an epiphany :)


I started by giving them a fresh coat of Heirloom White. They were an off white to start with but they had some sort of glaze that just made them look dirty.


Whew...better already!


I realize that the art doesn't look that bad from a distance, especially if you're into Chinoiserie like me, but trust me - they're pretty bad. They're embellished with sequins and glitter.


I took out all 50 of the little pins that were holding the back on to take the glass and backs off in order to paint. I couldn't get them back in so I improvised and used tape. Hey - it worked!


I filled them with my mocha Lovely Lattice! The color is what drew me to this fabric in the first place since it is super close to the paint color in my master and I love this fabric so much, I wanted to use every last bit of it.


I really love how they turned out and they give that corner some much needed character.


My husband isn't totally sold on them. He still thinks he's going to put up and display his autographed baseballs here...sorry, hun. Not going to happen!  What do you think? Do you like them or should I replace them with sports memorabilia?

Wednesday, February 23, 2011

Dresser Tray (Before & After)

Last month I had a very successful day thrifting. I took pictures of all my finds and had intended to post them here but my inner procrastinator took over and I just never got around to it. Anyway, here is one of those items and what I did with it :)

I'm in love with all the pretty dresser trays I've been seeing around the blogisphere and I needed something to lighten up the top of my dresser in my dark bedroom so I was on the hunt for something I could work with but I refused to spend a bunch of money.


I found this for a buck. Not much to look at but I liked the shape and for the price - I figured it was worth the investment :)

I primed and sprayed her Heirloom White. The scale is way off so I'm thinking she's going to need to be replaced but for now, it will do!

I was planning on putting some pretty navy zigzags on it but since this is only a temporary piece, I'm just going to leave this one.  The atomizers were my grandma's. She passed away over twenty years ago but when I opened up the silver one I could still smell her perfume. It was crazy - gave me warm fuzzies :)

The tea cup was another find from that day thrifting, it was a dollar too! It is the perfect catch-all for change and lip balm.

I put some votive holders up to play with the scale issues but they didn't help. I need to find another place for them though because I've always liked them.

The photo is one I took of my daughter. I had ordered the 11x14 print and didn't know for sure where in the room it was going. I decided that I'm going to order a 16x20 on canvas of that pic because it really needs something bigger above that dresser, I just need to convince myself to shell out the bucks for it!

So, help me out with more ideas for this space. Is there anything you would add? I'm kind of thinking a tall white ceramic piece for the right side but I need to find the right shape...

Monday, February 21, 2011

A Simple Fix (Before & After)

I recently posted about my search for the perfect lamps for my master.  It was suggested that I find some lamps to spray paint and I thought it was such a good idea that I went with it. I had these lamps on my nightstands anyway and had been considering painting them, I just couldn't decide on a color.


I wish I had thought to take a picture of them in place before I took them out to paint but I was just so excited to get it done that it slipped my mind.  They really weren't bad to begin with (other than the ugly yellowish-cream colored shades they came with) but the dark color in my room just needed something to brighten it up.


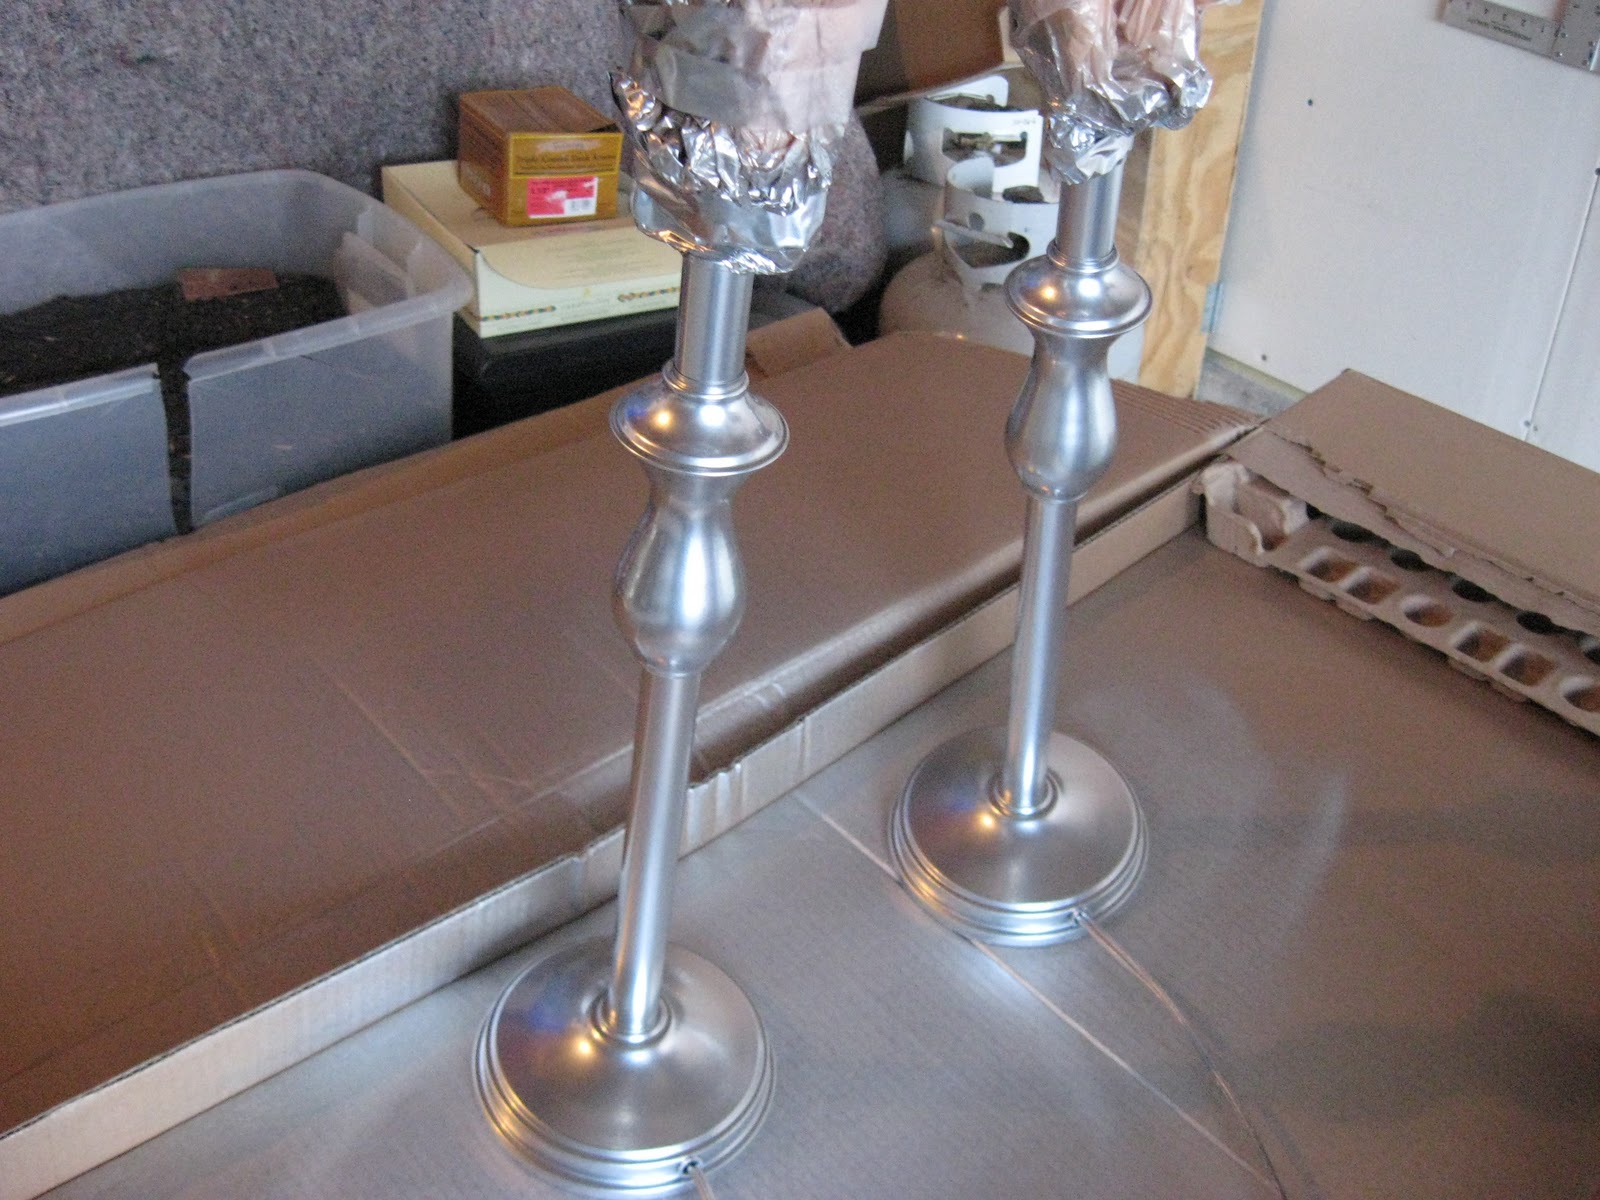
I gave them a quick couple coats of some Krylon Metallic spray paint in Silver Foil  and replaced the icky smoke-stained looking shades for a pair of inexpensive drum shades from Target ($7.99 each!).


Now I've got a nice light, light!

On another note, I never actually had these lamps plugged in before, I really just set them there to get them out of the way from another room. I can't believe I never had them on before because they make such a huge difference in my dark room. I love them and are so thrilled with the result. So, for less than $20 (cost of shades + paint) I'm a happy little girl.

We had a busy weekend in our house. We got our guest room painted and ready for a total transformation into a combo guest room/office. I'm so excited to finally have a designated area for crafting/blogging but I think I've already mentioned that once or twice :)

Hope you all had a great weekend and I am looking forward to sharing some more projects this week.

Wednesday, January 12, 2011

In the Navy...

I've never really been a fan of blue.  Not that I don't like the color, I just favor green.  However, for some reason I've really found myself attracted to blue lately.  Last fall I found a photo online of these beautiful drapes from Pottery Barn and fell in love with the fabric.

(Recognize it?)

As much as I loved the drapes, I did not love the price tag.  These were $79.99 each for the 84 inch panels.  I started searching ebay on a regular basis and found five yards of the fabric itself for $80 +shipping.  Awesome deal.

Anyway, back to the point.  Blue.  These have a good deal of navy blue in the pattern.  Here is a pic of the bedding in the same pattern - you can see the pattern better:
Love it!  I made some simple drapes for my bedroom - when I say simple, I mean SIMPLE! I just finished the edges with a straight stitch and didn't bother with a pole pocket because I prefer using clips. I wouldn't have even had to sew, I could have used Stitch Witchery but I didn't feel like shelling out the (few - this is really inexpensive) extra bucks for it.  

Anyway, my master looks pretty much complete but I'm just not happy with it. There are a few little touches I really want to get right before I can consider it "complete".

I've been looking for the perfect (but inexpensive) lamps for our nightstands. Our wall color is dark so I really want something that will lighten (pun intended!) the room up. Currently, I'm using some oil-rubbed bronze finish table lamps with cone shades that I really don't like. Really they were just supposed to be a temporary stand-in but they've been there for six months or so. I've been considering silver leafing them and picking up some great light drum shades but I just can't make up my mind.

Last night I was at Target and found some beautiful lamps that I fell in love with!


Excuse the poor cell phone pics - I don't typically travel with my camera ;)  These blue bases are the perfect color - they're not a true navy, they almost have a little cobalt. I really, really love them but with my dark walls, I'm afraid they would be too dark. See those shades though? They're white with navy ribbon - love them. 


These clear bases are more what I'm needing. I love that they're clear and the shape is fantastic! I'm thinking I would love them with those shades above but for two lamps plus shades, we're talking $120!  Ouch!

Anyway, the master is one of my projects I've got planned for 2011...and boy, do I have a lot of projects planned!  I've really enjoyed blogging these past few months and am looking forward to so many more great posts and projects (so much so that I've got almost 50 drafts started!). I really hope you decide to stick around to see what I've got up my sleeve :)
Related Posts Plugin for WordPress, Blogger...